Gmail is a great email system.
But – dailyblogging2020@gmail.com sounds spammy — Thanks to tons of Link Builders and Sales Outreach teams that create a ton of SPAM emails like that!
I personally get a ton of email – asking me to sell them links or add guest posts on my blog.
I completely avoid all such emails. The easiest way I do that is not to open any email unless it is with a custom domain. If a person did not take 20 minutes and $20 bucks to set up a professional email, I would not consider them a serious professional!
I have left my website email to dailyblogging2020@gmail.com for more than two years now, just because I was never in the business of gaining people’s trust.
Now that I want to enter the game of SEO consulting and SaaS SEO services, I decided to take my email seriously.
Since I was setting up my email, I thought I would write a guide that would help any beginner who wants an easier way to set up a professional email and get all the benefits of Gmail.
There are tons of other ways to set up a professional email with a domain name in it.
Some cheap, and some expensive
Some are basic while products like Google Mail are rich with useful features.
My main reasons for considering Google Workspace for professional email are
- It’s very easy to set up
- Google is trustworthy
- It supports all my use cases (Streak CRM compatible)
- I am used to using Gmail.
- It has a ton of other integrations in the form of extensions.
- The community is big. There are tons of resources and knowledge bases on every business use case.
So, how do you set up a custom professional email with Gmail?
There are two different scenarios here
- You don’t have a custom domain name
- You have a domain name.
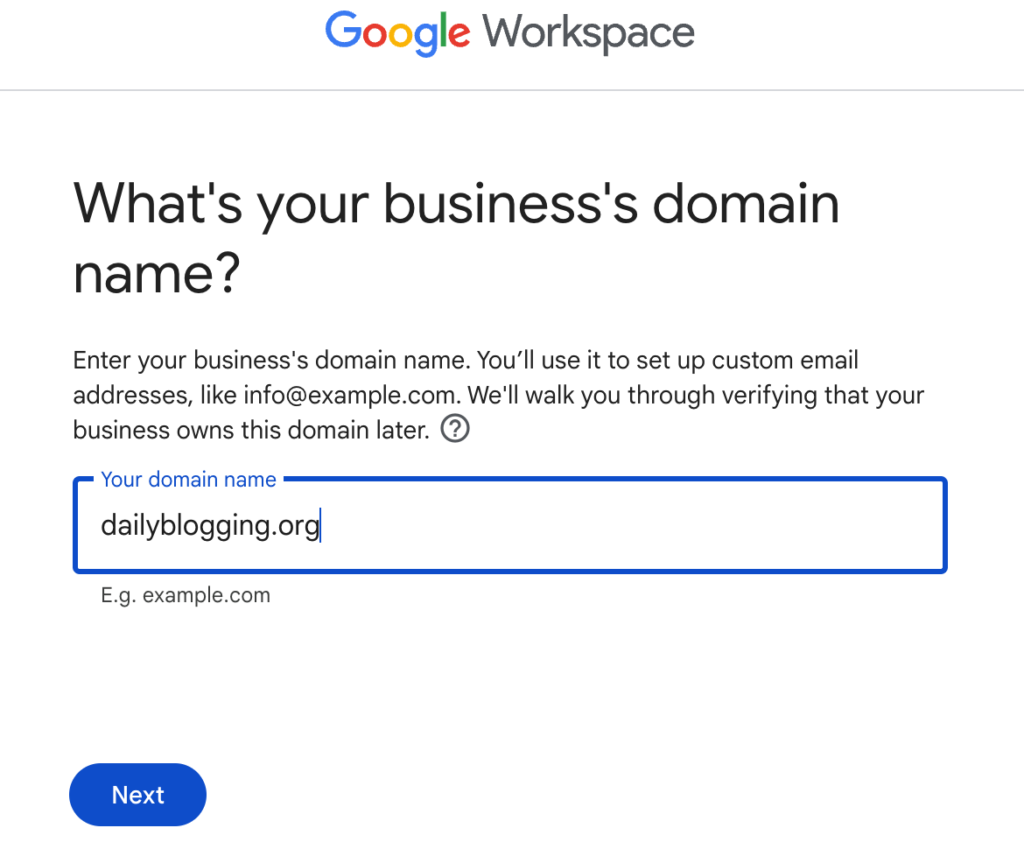
I have my domain name – dailyblogging.org.
So my goal is to build an email – munni@dailyblogging.org
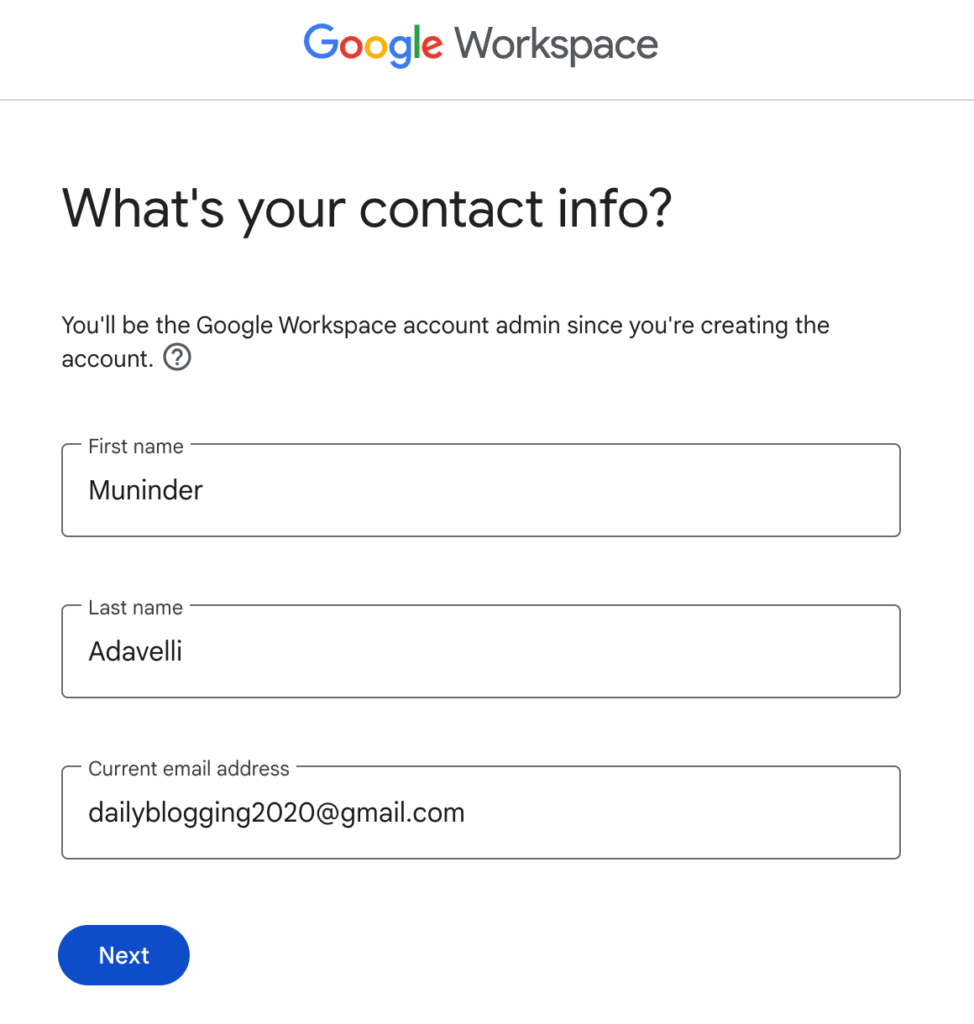
Step1 – Type Google Workspace in Google
Enter your basic details
Step 2 – Choose the domain or use the domain

Step 3 – Enter your domain name without https://
Step 4 – Enter the email ID you want
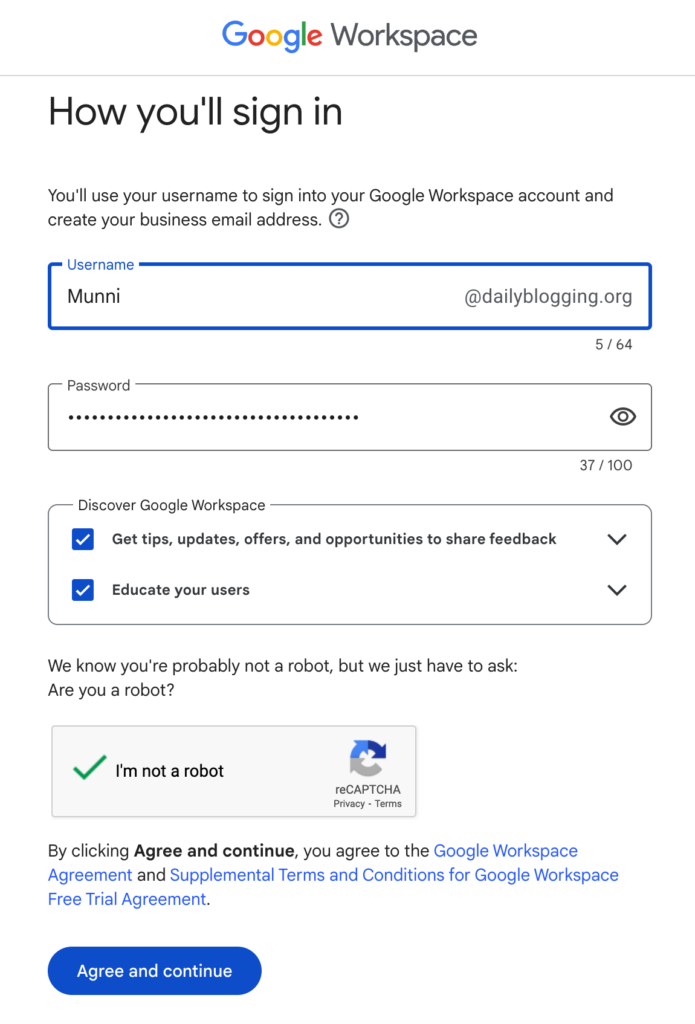
Save the password you use in this step.
Step 5 – Choose a Plan
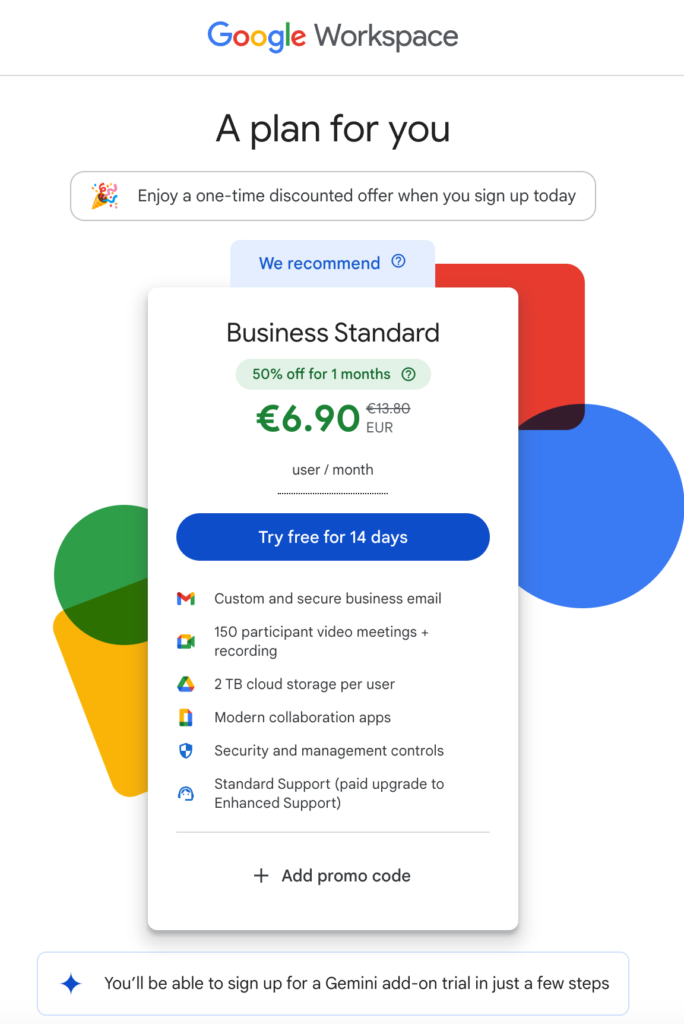
So far everything is as easy as setting up a free Gmail ID
From step 6 it might get a bit more complicated for those who have no idea of web hosting side of the game.
Step 6 – Adding MX records in the hosting
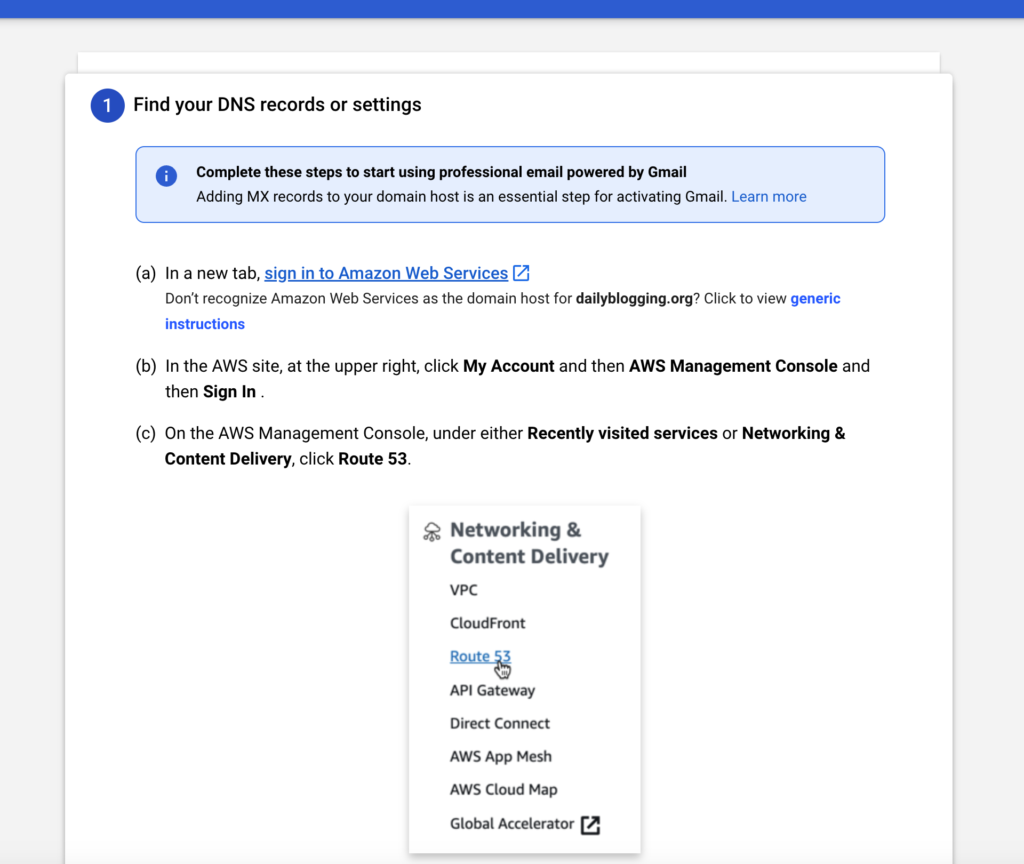
As my blog is hosted on AWS, I had to go there and set up the DNS records.
Note: If you used Lightsail for nameserver generation, you might have to update your MX records under Domain And DNS in Lightsail. You don’t have to go to Route 53 for MX records updating.
Following this step, the Google Workspace set-up dashboard will give mail exchange server details and MX record verification details
>> Open your DNS records section on your host
>> Click on Add Record
>> Select MX Record from the dropdown
>> Type @ in the record name field
>> Paste the Exchange server details in the value field
>> Edit the priority text field value as 1
then
>> Click on Add Record
>> Select MX Record from the dropdown
>> Type @ in the record name field
>> Paste the MX record verification details
>> Edit the priority text field value as 15
Go back to the Google Workspace dashboard and click on Verify.

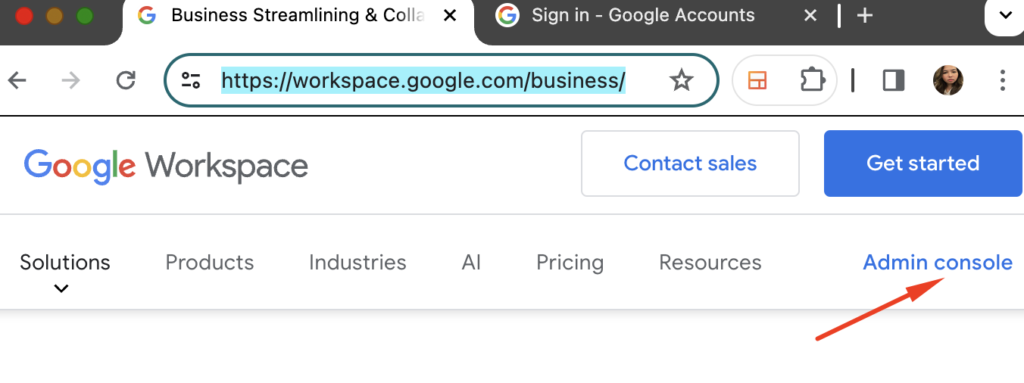
Step 7 – Now, you can go to https://workspace.google.com/business/
Click on Admin Console
Use the email ID you created with the domain name and the password in Step 4 to log in the workspace.
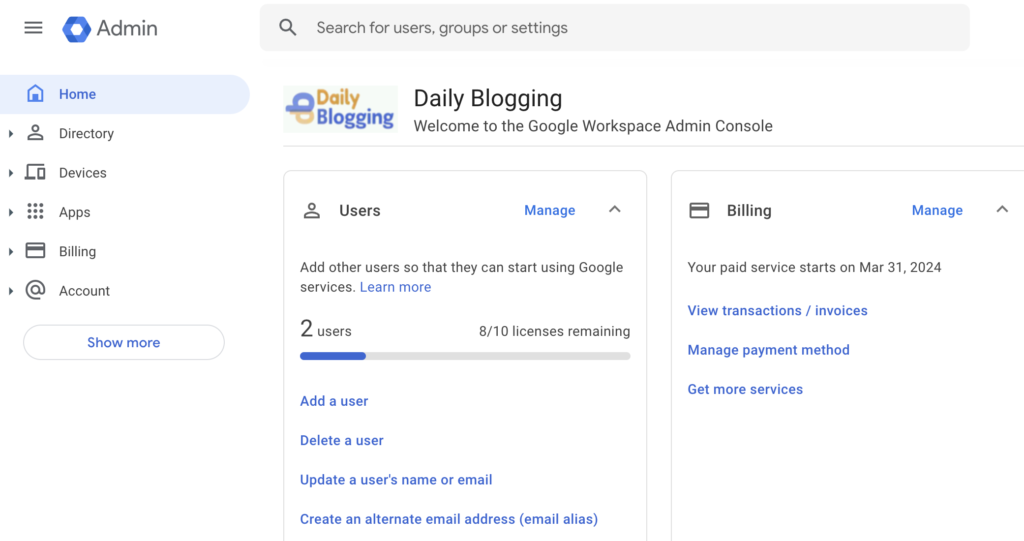
You can now add users to create new emails on the same domain name.
You can also create alias emails for the already created emails.